
-
How to Fix Empty Down Sleeping Bag Baffles and Prevent Down Migration
Nothing ruins a camping trip faster than discovering your down sleeping bag has lost all its insulation. This can happen after going through the wash. You wonder if something you did during the wash cycle or while hand washing that tore open a baffle wall, causing the down to migrate throughout the bag. The good news? Whether it needs warranty repair or a DIY fix, you have options. Plus, it might not have been something you did at all. It might be the way the bag is constructed. Before you dive into a potential fix, you need to know a bit about down sleeping bag construction. Down Sleeping Bag Construction…
-
Tripods for Canoeing and Kayaking
The author, a professional photographer who also teaches photography, evaluates three tripods ranging from 1 to 3 pounds. They discuss the pros and cons of each, focusing on factors like weight, stability, and height. The author recommends using Kirk L Brackets for better camera support and shares purchase links for the tripods.
-
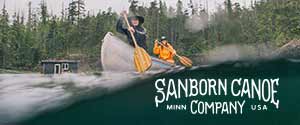
Sanborn Canoe’s New Minnesota State Flag Paddle
If you haven’t heard, Minnesota recently finished the process of redesigning its state flag. The old flag was of the “state seal on a bedsheet” type. It also redesigned the state seal — and decided on an epic canoe country inspired design. THE BEST STATE SEAL IN THE NATION. You can learn about the redesign at the Minnesota Historical Society’s website. Even though some polls might say that the new state flag looks like “Sky Camouflage,” the new flag looks great when put on merch. I expect this will become a profitable market to be in over the next couple of years. You should expect it to see it on…
-
Improve Bear Bagging with This Cord Winder
For years I’ve been stuffing my bear bag rope into a stuff sack or throw bag for storage or winding it around my hand and then placing it in in the bag for storage. At the next campsite, it inevitably becomes tangled as I take it out. I’ve discovered a product that prevents the tangly mess of bear bag ropes. It’s the Cord Winder by Hilltop Packs. The best part is that it is only $5. I bought two for reasons explained below. The concept is simple. Take the idea of line winders for kites and apply it to bear bags. That’s exactly what Hilltop Packs did when making the…
-
DIY Sawyer Gravity Filter
One of the challenges of a group paddling trip is treating enough water for everyone. According to the U.S. National Academies of Sciences, Engineering, and Medicine you need about 3.7 liters of fluids a day for each man and 2.7 liters for each women. For my family, that’s around two gallons to three gallons of water a day. To meet the need, we’ve been using a DIY Sawyer gravity filter system. I’ve experimented with it over the last several years and think that I’ve finally found the right combination of gear to make it work for us. Note: I’ve updated my system. Read my DIY Gravity Water Filter System article…
-
Solo Paddling Gear for the Boundary Waters
To wrap up the series (except for electronics), here’s a list of the solo paddling gear for the Boundary Waters that I used on my recent trip. It’s pretty basic compared to all the rest of the gear lists. I plan on making a public spreadsheet and getting the electronics list up soon. Canoe for the Boundary Waters I use the Northstar Magic. IMHO, there isn’t a better solo canoe for the Boundary Waters. It’s fast, stable, and holds its directional stability in the wind regardless of where you point it. It’s a dry ride. The flare gets it over even steeper chop that you might encounter on the bigger…
-
Lightweight Camping Cook Set for Canoeing and Kayaking
I recently got back from a ~160 mile trip that followed the route of an 1879 expedition to the north shore of Lake Superior and into what is now called the Boundary Waters Canoe Area Wilderness. The route included around 30 miles of portages and I needed to go lightweight. In the past, I used a slightly lighter cook set for camping, but I changed my camping cook set for 2021 to something slightly heavier. I did so because the stove is so much better and more fuel efficient, especially in wind, and I also wanted to try a new water bottle. Lightweight Camping Cook Set The main system is…
-
Kayaking Accessories for Beginners
As a first time kayak buyer, you probably didn’t know or don’t know what kayaking accessories to get with your first kayak, and unless you bought from a knowledgeable salesperson, who also kayaks, he probably didn’t get you everything that you needed. The problem is two-fold: 1. Many salespeople don’t understand kayaking. 2. When you first start, the kayaking accessories just don’t seem necessary. A third problem occurs when you run into a salesperson that believes the second point. Although the first problem is easy to fix — just go to a different store — the second is much harder. To fix that second, you can take a sea kayaking…
-
Best Backpacking Sleeping Pad for Paddling
In my S24O: Kayaking Kit List article, I wrote about my future needs, “As I’ve gotten older I don’t mind sacrificing a bit of weight for a more plush sleeping pad. So, I brought a bigger pad than I have in the past. While not a huge deal inside the kayak, it is bigger than I’d like. I’d like to get a smaller sleeping pad that offers big comfort. If you have a suggestion, please, let me know in the comments.” I received a few emails and I messaged some buddies of mine to see what they suggested as the best backpacking sleeping pad for paddling. From Max Watzke: You asked…
-
S24O: Kayaking Kit List
I recently started doing more S24Os (sub-24 hour overnight), because it seems like with everything I’ve taken on over the last year I’m not getting out of personal paddling trips anymore. I recently visited the Fall River campsite on the Lake Superior Water Trail. The MN DNR is planning on building a bridge in front of the Fall River waterfall and next to the campsite ruining the privacy that the you get at the campsite, so I wanted to go there one last time before the DNR ruins it. If you want to take action, visit They Want to Put a Bridge in Front of the Fall River Waterfall for…
-
Lightweight Cook Kit
It seems like I’m always tweaking my lightweight cook kit. While preparing for some upcoming bikepacking trips (gasp), I redid my lightweight cook kit yet again. This time it has a new stove and pot. This lightweight cook kit could be used for backpacking, canoeing or kayaking and work out just fine. What I really like about it is that the stove, fuel canister and spoon all fit inside the ultralight mug, which is compact. Overall, I’m in at 15.8 ounces for my kitchen. Leaving behind a stuff sack and elastic band saves me 0.3 ounces, but they also add convenience so I’m going to carry them. Lightweight Cook Kit…
-
Greenland Paddles Can’t Get No Respect
In the Fall 2015 issue of Adventure Kayak, James Roberts writes an article called Stickin’ It To ‘Em: Greenland paddles are superior in every way to their wide-bladed brethren. In the article he states, “It’s time Greenland paddles got some respect.” He then goes on to point out the myths and benefits that he finds when using a Greenland-style paddle (GP). I’ll list these below. While reading the article, it felt like being transported back to the late-90s or early 2000s when the online paddling world at paddling.net argued about which was better. I thought this issue was settled back then with the conclusion that you paddle what you like.…
-
What I’d Bring on a Summer Canoe Trip
Over the years, I’ve written a lot about what I bring on canoeing and kayaking trips, and now that I’ve sold my kayak guiding business (blog post coming on why soon) I’m really looking forward to canoeing more often. In fact, I’ve been in a canoe more often than I’ve been in a kayak this year. I haven’t been able to say that since 2006. Not only have I been canoeing more often than in past years, I’m starting to think about a few new and interesting trips that I could take in the next five years by canoe. I’m really excited about canoeing, so when Lisa, Community Manager at Salt…
-
Where to keep your kayak pump?
I consider a kayak bilge pump an essential kayaking accessory for all levels of kayakers. I know that there’s a movement out there that says that you don’t need one, but I’m not in that camp. At some point, if you leave swimming distance of the shore, you’ll need to pump out a kayak, either your boat or one of your paddling partners. The key about a pump is that in order for it to be useful, it needs to be accessible when you need it. And, that means that it really needs to be close to the cockpit. There are a couple of ideas about where exactly to store it,…
-
Lightweight Stoves: Rated for Ease of Use and Weight
Over the years, I’ve used all kinds of backpacking stoves for my kayaking and canoe trips. Those stoves have burned a variety of fuels, including white gas, alcohol, wood, propane, isobutane and esbit — I’m probably missing a few. I’ve used different configurations of stoves from systems designed specifically to work with one stove and one pot, such as Jetboil’s stove to systems that I pieced together to systems that I built myself. After spending a weekend using a stove that just wouldn’t work, I decided it was time to stop messing around with my stove systems and just pick one variety and stick with it. Life is too short to…


Or if you use a RSS Feed Reader subscribe via our RSS Feed.